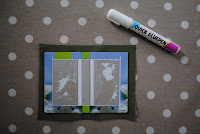
Each year, my grandmother gives me the Dairy Diary for Christmas. This year it came with a mini diary as a free gift, which was lucky as David decided yesterday that he needed an appointments diary to use at work. He thought the mini diary would be suitable for what he needed but didn't like the cover, so he asked me if I would re-cover it for him. This is what it looked like:
This is what it looked like when I had finished:
Using a craft knife, I removed the book from the hardback cover.
Using the hardback cover as a template, I cut out some fabric that would form the new cover for the diary (leaving 1cm extra all the way around). The fabric was part of a placemat from IKEA, that we already had.
I then glued the fabric to the hardback cover using a gluepen.
Next, I folded over the 1cm of extra fabric at the top and bottom of the diary, and stuck them down using the gluepen.
Using scissors, I cut right-angles out of the extra fabric at both sides of the diary (at the top and bottom).
I then folded the corners over like a parcel, and stuck the extra fabric down at the sides of the diary.
Lastly, I stuck the book back into the hard cover, by putting glue down the spine, and over the back of the front and last pages (the pages that had previously been stuck to the cover). I then cut out a piece of decorative paper, and stuck this in at the front and the back of the diary to mask some imperfections that had been caused by peeling the book away from the cover.
And there you have it - a diary with a much nicer cover, made with scraps that I already had in the house. The whole thing took about 30 minutes to make, and cost me nothing.


No comments:
Post a Comment